Huawei B715 VS Huawei B525 LTE Router

In past few years, Huawei has presented many LTE WiFi routers to the market. Some are especially for the network provider in specific areas or countries; some are open for all the market (SIM-free for global travel). However, Huawei didn’t provide a full list of its 4G LTE Routers. Some models can’t be found on its official site, so as the specs of the Huawei LTE routers. Huawei B715 LTE router and Huawei B525 are the two models which cannot be found on Huawei official site, but they are definitely Huawei products for LTE-A networks. Some customers may have trouble to buy the unlocked version of the two routers for their applications at home or office etc…Today, we will have a general review of the difference between Huawei B715 and B525 router. You may get the reference if you want to buy one of them.

Appearance

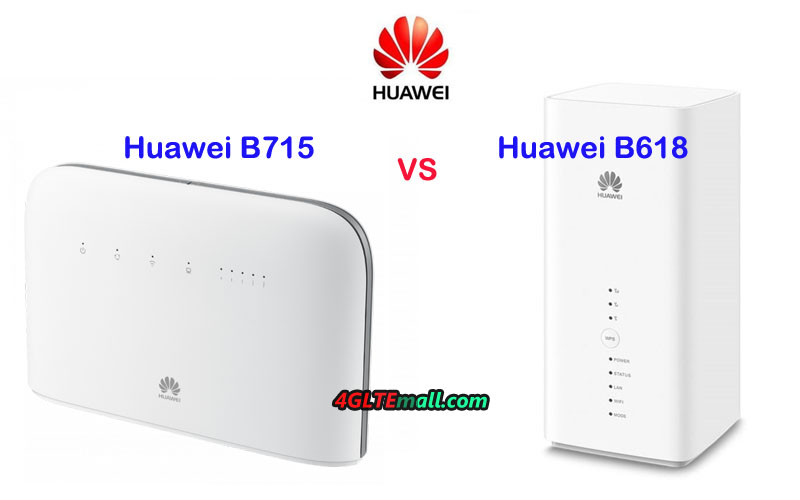
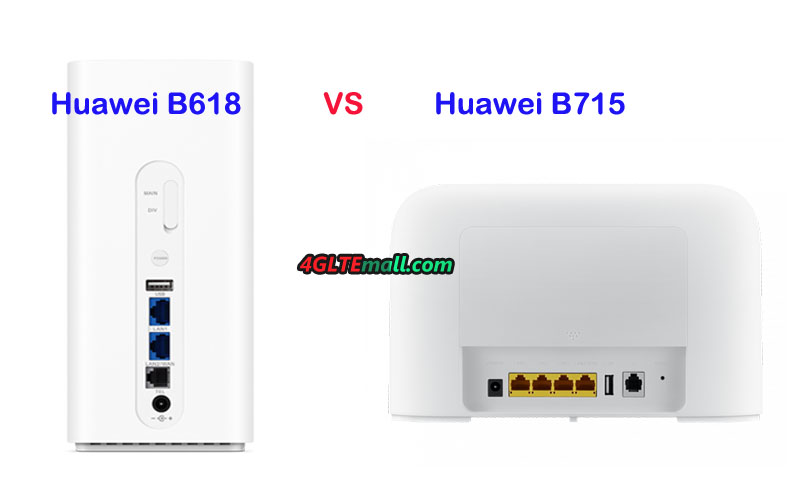
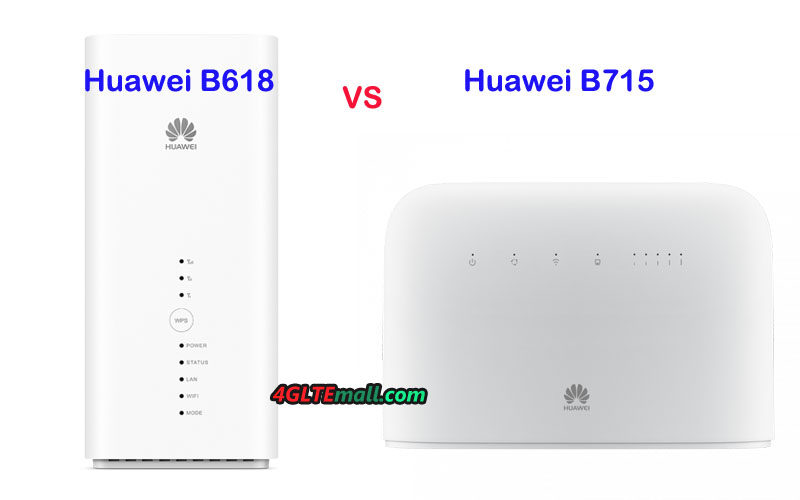
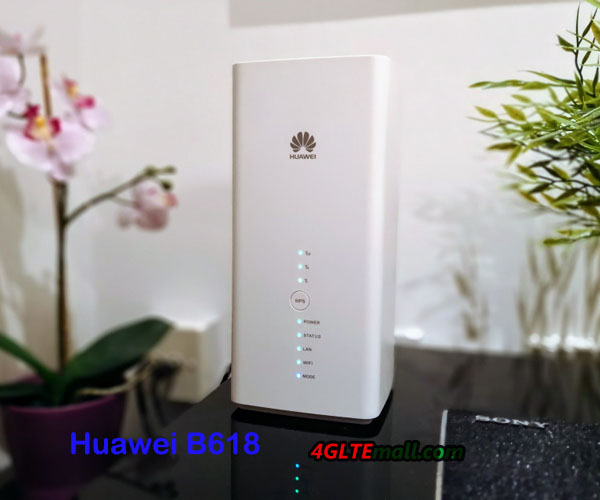
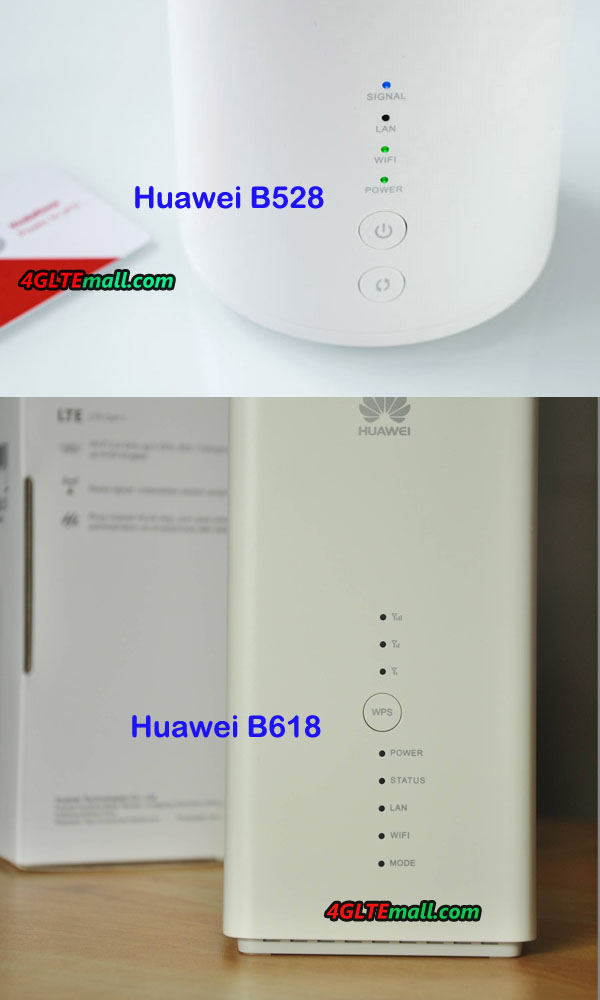
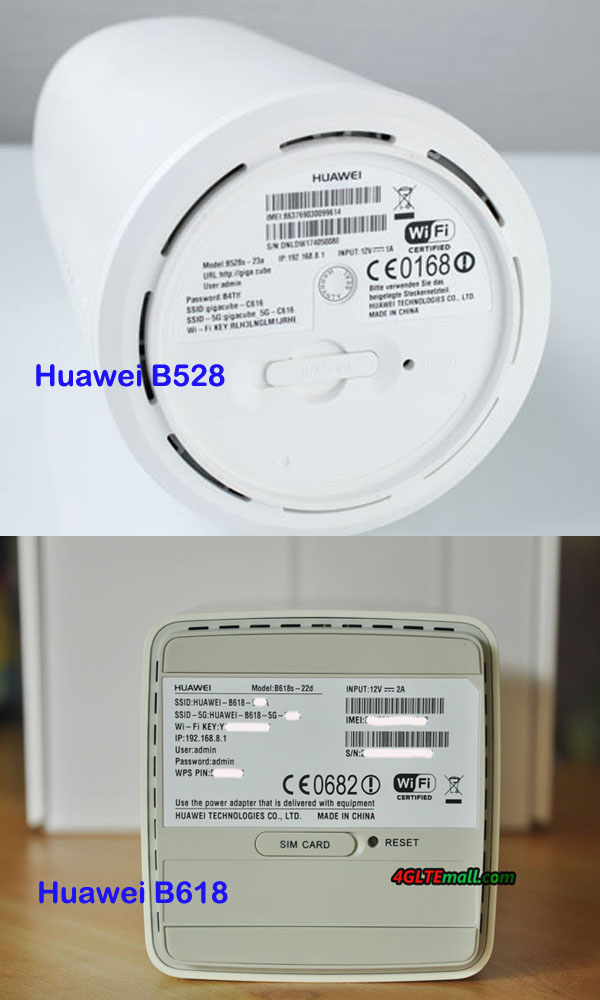
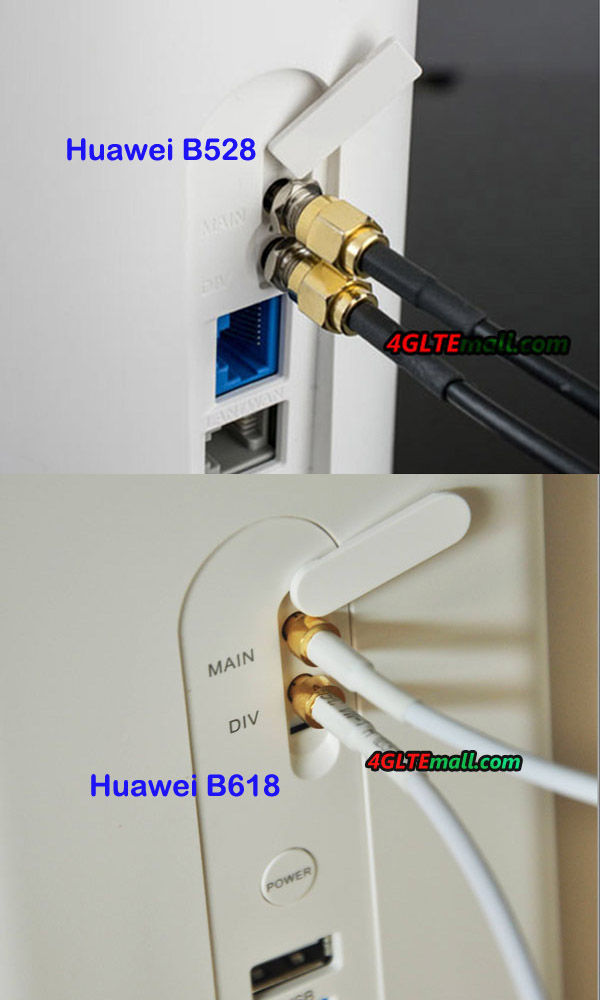
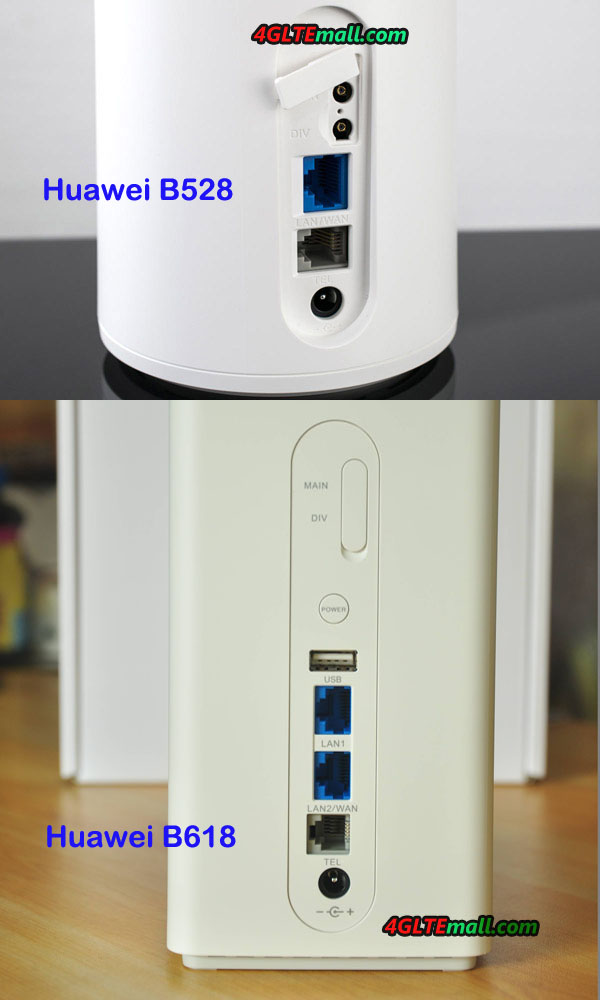
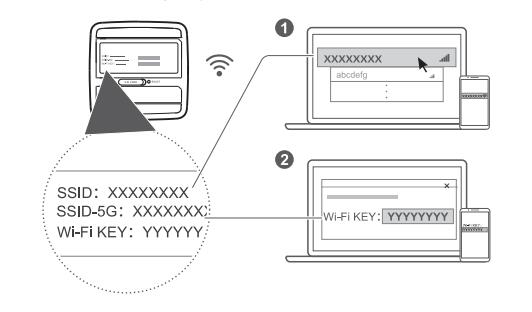
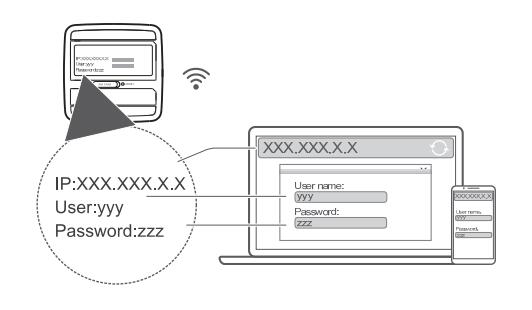
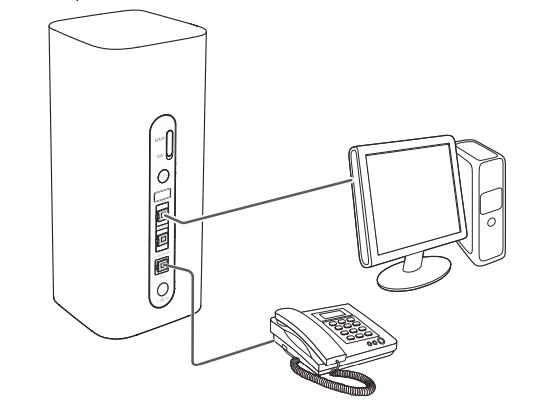
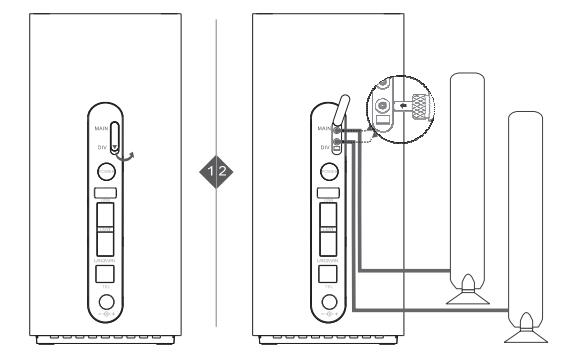
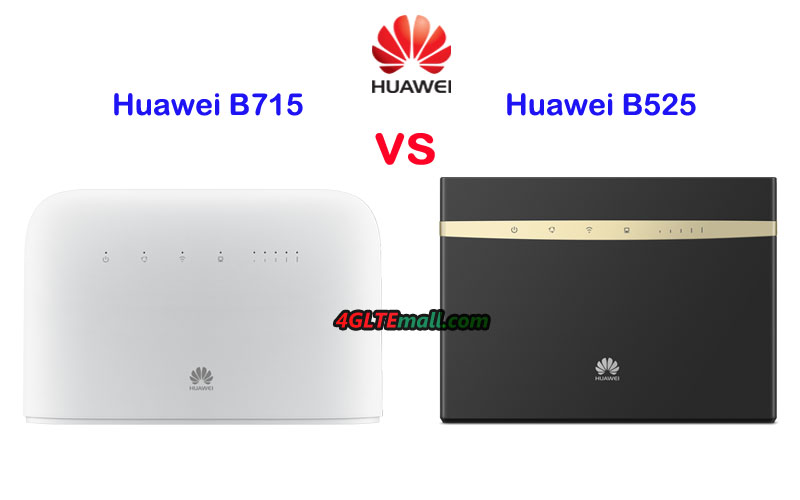
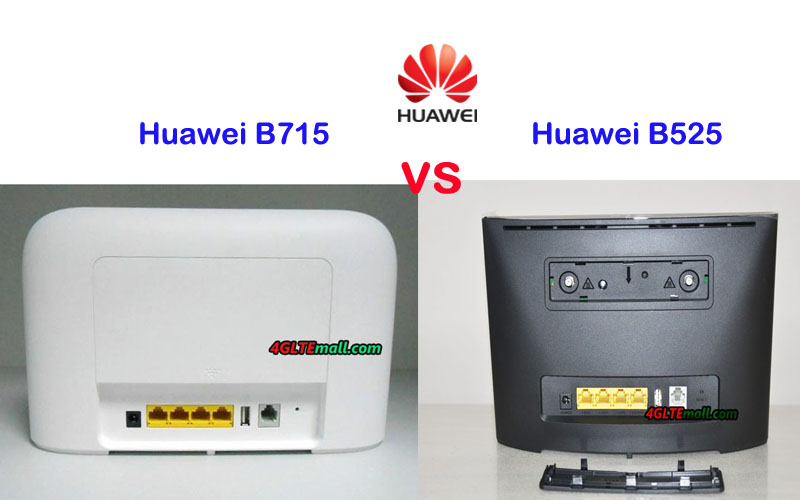
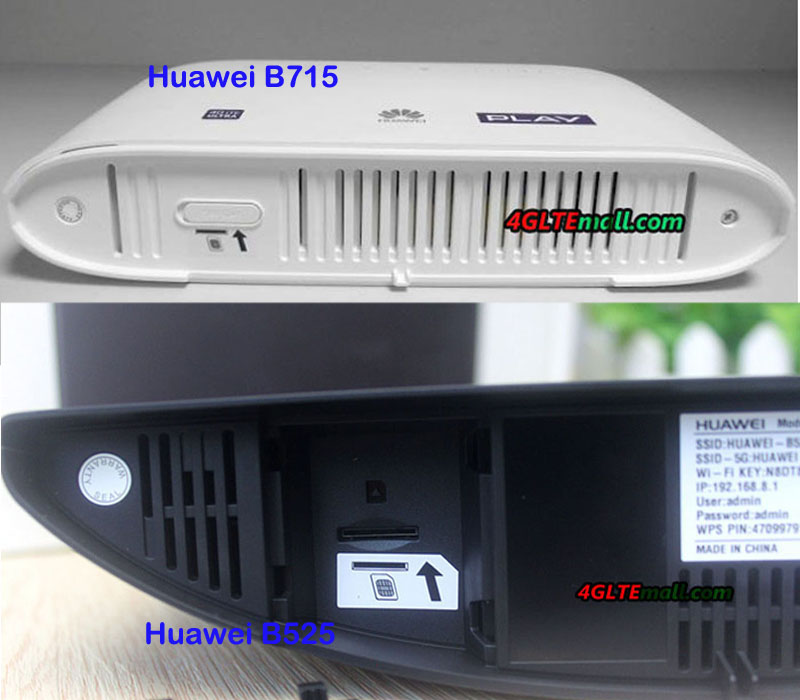
Unlike the latest Huawei B618 LTE Cube, both the Huawei B715 and B525 are in the shape of a traditional wireless router. On the front, the Huawei logo and few LED indicators for power, WiFi, internet connection status and signal strength. On the back, 3 LAN ports and one LAN/WAN port with telephone port are listed at the below side. On the top side, two SMA connectors for external antennas are covered by a cap. Huawei B525 router had the label at the bottom, and we can see the crescentic shape from the bottom side. The label of Huawei B715 is just at the side of the external antenna connectors. The label and connectors are covered by a whole cap. However, like the Huawei B525 router, the SIM card slot of Huawei B715 is also located on the bottom side. Like other Huawei 4G wireless router, some important information would be printed on the label, such as the model number, IMEI number, S/N number, SSID, WiFi Key, web log in IP address, WPS pin, FCC ID, power plug voltage, WiFi certified, RoHS logo, Made in China and some model may have the supported LTE frequency bands if there is. Here now, the Huawei B715 has only white color available, but Huawei B525s-23a has black and white color available.

Variant models

Here now, the Huawei B715 has only one variant model Huawei B715s-23c with the support of 4G LTE Band 1/3/7/8/20/28/32/38 and 3G &2G network backward compatible. We are not sure whether Huawei will release more variant models to support different LTE frequency bands combination for other network providers. But as you can see, Huawei B525 has three variant models: B525s-23A, B525s-65a, B525s-95a. They support the frequency bands as below:


Huawei B525s-23a:

– Support 4G LTE Band 1/3/7/8/20/32/38 (FDD 800/900/1500/1800/2100/2600MHz, TDD 2600MHz)

– Support 3G DC-HSPA+/HSPA+/UMTS Band 900/2100MHz

– Support 2G GSM/GPRS/EDGE 850/900/1800/1900MHz


Huawei B525s-65a:

– Support 4G LTE Band 1/3/4/5/7/8/20/19/26/28/32/38/40/41 (FDD 2600/2100/1900/1800/1700/1400/900/850/800/700MHz, TDD 2300/2500/2600MHz)

– Support 3G DC-HSPA+/HSPA+/UMTS Band 1/2/5/6/8/19

– Support 2G GSM/GPRS/EDGE 850/900/1800/1900MHz

Huawei B525s-95a: Unknown yet!

Specifications

You may be attracted by the appearance of the two routers, but when if you want the router to work well at your location, you must see the specifications of the two router. Below is the list comparison of the Huawei B715s-23c and Huawei B525 WiFi router specs for your reference:

Model Huawei B715s-23c Huawei B525
Product type LTE WiFi Router LTE WiFi Router
Category LTE Cat.9 LTE Cat.6
Chipset ? HiSilicon LTE Cat6 Chipset
Data rates DL 450Mbps/UL 50Mbps DL 300Mbps/UL 50Mbps
Supported 4G LTE frequency bands LTE B1, B3, B7, B8, B20, B28, B32, B38 B525s-23a: Band  1/3/7/8/20/32/38
B525s-65a: Band  1/3/4/5/7/8/20/19/26/28/32/38/40/41
WLAN 802.11a/b/g/n/ac, dual-band 2.4GHz & 5GHz 802.11a/b/g/n/ac, dual-band 2.4GHz & 5GHz
Max supported users 64 users 64 users
MIMO 4 X 4 MIMO 2 x 2 MIMO
Connector for external antenna Two, SMA-female jacks Two, SMA-female jacks
Buy Antenna Huawei B715 External Antenna Huawei B525 external antenna
App management Huawei Hilink APP Huawei Hilink APP
SIM Size Micro SIM Micro SIM
Battery NO NO
Dimensions 240mm × 448mm × 47mm 163 x 52 x 226 mm
Interfaces * 1 x power adapter port
* 3 x LAN port(45)
* 1 x LAN/WAN port (45)
* 1 x telephone port(RJ11)
* Two external LTE antenna ports (SMA-J1.5)
* One micro-SIM card slot
* 1 x USB 2.0 port
* 3 x LAN port(45)
* 1 x LAN/WAN port (45)
* 2 x telephone port(RJ11)
* Two external LTE antenna ports (SMA-J1.5)
* One micro-SIM card slot
* 1 x USB 2.0 port
Datasheet Huawei B715 Datasheet(PDF) Huawei B525 Datasheet(PDF)
User Manual Huawei B715 User Manual(PDF) Huawei B525 User Manual(PDF)
Other features  VPN, VoLTE, IPv4 /IPv6 dual stack, DMZ, Port forwarding  Firewall, CS Voice, VoIP, TR069 Remote Management, HTTP Online Upgrade, QoS, USB Share, UPnP, IPV6, DLNA, Fax, Print, VPN
Reviews Huawei B715s-23c Review Huawei B525 Review
Price/USD 399.00USD 259.00USD


Huawei B715 VS B525 Speed Test

If you want to know the real speed performance, check the Huawei B715 VS Huawei B525 Speed Test in the video:


Conclusion

From the specs table, we can see Huawei B715s-23c is more advanced supporting higher LTE level networks with faster downlink. Huawei B525 provides more variant models for different LTE frequency band combination and more colors to select. Usually, the more advanced of the router, the price higher. So we can see the Huawei B715 is more expensive than Huawei B525 router. If you don’t care about the price, then Huawei B715 is the right one for you. Huawei B525 may not the most advanced, but for most customers, the downlink speed is enough for most applications cases. Almost same interfaces would not make you in trouble when you connect few devices simultaneously. The important is if you want to fulfill extra functions such as VPN, VoLTE, VoIP or DHCP, you may check the datasheet carefully to confirm.

However, if you don’t know how to select from the variant models, you may refer to this blog: Five Tips to Buy a Huawei 4G Router.

Huawei B715 VS Huawei B618 LTE CPE

As time goes, more and more network providers upgrade their LTE networks to LTE Advanced with the application of new LTE technology such as carrier aggregation and MIMO. Many customers want to surf at the faster speed than ever. So an LTE advanced router may be necessary for home or office. Huawei B618 and B715 are two latest popular routers for the LTE-A networks. Someone may ask: what’s the difference between Huawei B715 and B618? To buy one from them, which one is better? To answer this question, let’s have a compare of the two LTE WiFi routers.

Appearance

Huawei B715 and B618 router both could work well in Europe. Some network providers already introduced them to their contract plan. The Huawei B618 was available for EE, Telekom on the model number B618s-22d while B715 was available for LMV on the model number B715s-23c. The Huawei B715s-23c looks like the common Huawei 4G WiFi router such as Huawei E5186 or Huawei B525, but Huawei B618 looks like a cube. You may think it’s a smart home device rather than an LTE-A wireless router.


On the front of Huawei B715s-23c, there are few indicators for power, data transmission, WiFi, connected device, and signal. On the back, there are 4 RJ45 ports for LAN, one of which is for WAN/LAN. And one RJ11 port is available for connecting telephone. Huawei B618s-22d LTE router has only one port for LAN/WAN and another one for LAN only. They both have a USB 2.0 port for sharing file. Like other Huawei LTE routers, the Huawei B715s-23c has two SMA connectors for external antenna while the Huawei B618s-22d WiFi router has two TS-9 connectors for 4G external antennas. They both have the same feature that the SIM card slot is at the bottom of the body.


Technical Specifications

To know more about the technical specs of the two LTE-A router, the table below will give clear information about the chipset, category, data rates, supported frequency bands, interfaces, and prices etc..

Model Huawei B618 Huawei B715s-23c
Product type LTE WiFi Router LTE WiFi Router
Category LTE Cat.9/ Cat.11 LTE Cat.9
Chipset HiSilicon Balong 750 ?
Data rates DL 600Mbps/UL 100Mbps DL 450Mbps/UL 50Mbps
Supported 4G LTE frequency bands B618s-22d: Band 1/3/7/8/20/38
B618s-65d: 1/3/5/7/8/28/40
LTE B1, B3, B7, B8, B20, B28, B32, B38
WLAN 802.11a/b/g/n/ac, dual-band 2.4GHz & 5GHz 802.11a/b/g/n/ac, dual-band 2.4GHz & 5GHz
Max supported users 64 users 64 users
MIMO 4 X 4 MIMO 4 X 4 MIMO
Connector for external antenna Two, TS-9 jacks Two, SMA-female jacks
Buy Antenna Huawei B618 Antenna Huawei B715 External Antenna
App management Huawei Hilink APP Huawei Hilink APP
SIM Size Micro SIM Micro SIM
Battery NO NO
Dimensions 95 × 95 × 208mm 240mm × 448mm × 47mm
Interfaces * 1 x LAN port(45)
* 1 x LAN/WAN port (45)
* 1 x telephone port(RJ11)
* 1 x USB 2.0 port
* 1 x power adapter port
* 3 x LAN port(45)
* 1 x LAN/WAN port (45)
* 1 x telephone port(RJ11)
* Two external LTE antenna ports (SMA-J1.5)
* One micro-SIM card slot
* 1 x USB 2.0 port
Datasheet Huawei B618 Datasheet Huawei B715 Datasheet(PDF)
User Manual Huawei B618 User Manual Huawei B715 User Manual(PDF)
Other features DHCP Server, DNS RELAY and NAT, VoLTE, IPv4 /IPv6 dual stack  VPN, VoLTE, IPv4 /IPv6 dual stack, DMZ, Port forwarding
Reviews Huawei B618s-22d Review Huawei B715s-23c Review
Price/USD 449.00USD 399.00USD


Conclusion

From the appearance, we can see both the Huawei B618s-22d and B715s-23c are cool, but I personally love Huawei B618s-22d better. But if you want the WiFi router to have more Ethernet ports to connect your desktop, the Huawei B715s-23c may be better. From the specs, we can see Huawei B618s-22d support higher level LTE networks with faster LTE downlink & uplink speeds. But if you need the LTE router to work for more LTE frequency bands especially for band 32 or band 28, Huawei B715s-23c should be taken into consideration. And the Huawei B618s-22d with advanced LTE technologies would be more expensive, if you don’t care about the price, Huawei B618s-22d would be the right one for your home or office.

Huawei B618 LTE Router VS Huawei B528 LTE CPE

More and more Huawei LTE advanced routers are available for many network providers in the market. Among them, Huawei B618 LTE router and B528 routers may be the most attractive models. They don’t have the appearance of common LTE routers, but they look cool in the cube shape in white color. Somebody may ask, what’s the difference between Huawei B528 and B618 LTE-A router? Which one is better? If buying from one of them, which one to buy? After reading this article, we suppose you will find the answer.

Appearance

Huawei B618 and B528 LTE CPE are both available in 2017 and firstly presented the Europe market. The popular models for them are Huawei B618s-22d and Huawei B528s-23a. The Huawei B618s-22d LTE router is now available for Telekom in Europe. The Huawei B528s-23a was introduced by Vodafone to its product range. It’s also named Vodafone GigaCube or Vodafone B528s. Another network provider A1 also gets the B528s-23a CPE for its contract plan, and named it “A1 Net Cube Plus”. So the B528 may have Vodafone logo or A1 logo on the device. And the firmware may be customized by the network providers.

The Huawei B618 is in square cube shape while Huawei B528 is in a cylinder cube. But they both look cool and the touch feel is good when handing them even though the body material is made of plastic. On the front of the Huawei B628s-22d, there are 8 indicators for the connection status and WPS button is in the indicators. Huawei B528s-23a has 4 indicators with the power button and WPS button. The power button of Huawei B618 is at the back with two gigabit LAN ports(one for LAN & WAN) and one USB port, above which, two connectors are covered a small cap. The Huawei B528s-23a has only one Gigabit LAN (RJ45) port and one VoIP port.

At the bottom of the Huawei B618 and B528, the SIM card slot is located with the device information label, where the product name, IMEI number, S/N number, SSID and WiFi key, certifications are listed. In addition, the reset button is also available at the side of the SIM card slot.

Technical Specs

Regarding the technical features, you can have a clear review of the specs:


Model Huawei B618s-22d Huawei B528s-23a
Product type LTE WiFi Router LTE WiFi Router
Category LTE Cat.9/ Cat.11 LTE Cat.6
Chipset HiSilicon Balong 750 HiSilicon Balong 722
Data rates DL 600Mbps/UL 100Mbps DL 300Mbps/UL 50Mbps
Supported 4G LTE frequency bands LTE B1, B3, B7, B8, B20, B38 LTE B1, B3, B7, B8, B20, B32, B38
WiFi 802.11a/b/g/n/ac, dual-band 2.4GHz & 5GHz 802.11a/b/g/n/ac, dual-band 2.4GHz & 5GHz
Max support users 64 users 64 users
MIMO 4 X 4 MIMO 2 x 2 MIMO
Connector for external antenna Two, TS-9 jacks Two, TS-9 jacks
App management Huawei Hilink APP Huawei Hilink APP
SIM type Micro SIM Micro SIM
Battery NO NO
Dimensions 95mm × 95mm × 208mm 105 mm x 90mm x 181 mm
Interfaces * 1 x LAN port(45)
* 1 x LAN/WAN port (45)
* 1 x telephone port(RJ11)
* 1 x USB 2.0 port
* 1 x Gigabit LAN (RJ45)
* 1 x RJ11 (VoIP)
Other features DHCP Server, DNS RELAY and NAT, VoLTE, IPv4 /IPv6 dual stack IPv4 /IPv6 dual stack
Price 449.00USD 399.00USD

Summary

From the specs table, we can see that the Huawei B618s-22d is more advanced than Huawei B528s-23a. It could support faster download speed than that of B528 based on more LTE technologies. And more interfaces are available in Huawei B628s-22d for more connection possibility. Huawei B528s-23a has fewer interfaces and the speed is not as fast as Huawei B618, but for most users, the speed is still fantastic. And Huawei B528s-23a supports LTE band 32, which is not available in Huawei B618s-22d. Huawei B618s-22d LTE router has advanced features; consequently, the price of Huawei B618s-22d is higher than that of Huawei B528s-23a. So you are looking for an LTE advanced router with a budget price, Huawei B528s-23s seems more suitable for you. But if you need a future-proof router and would accept the high price, it’s no doubt that Huawei B618s-22d router is the best one for you.

Huawei B618 LTE Router User Manual

Many people are already getting or planning to get the Huawei B618 4G LTE Advanced Pro router, but many users may want to know how to use or setup the Huawei B618 router. Today, we will guide you know the Huawei B618 and use the Huawei LTE router well.


Getting to know your LTE CPE B618

Note:

* During thunderstorms and rainy weather, turn off and disconnect the LTE CPE B618.

* The LTE B618 CPE function descriptions and illustrations in this article are for your reference only. The product you have purchased may vary.


Application scenario

The Huawei B618 LTE CPE can:

* Provide Internet access for Wi-Fi® devices and a computer.

* Connect to a telephone for voice services.

* Expand LAN coverage together with a hub or a switch.


Note:

When the Huawei LTE CPE B618 is in use, you can alter its position or orientation to improve signal reception.


Selecting the installation environment Obstacles such as concrete and wooden walls will affect the transmission of the network signal. It is recommended that when you install LTE CPE you choose an open space. Keep the LTE CPE away from equipment that generates strong magnetic and electric fields, for instance microwaves, refrigerators, and satellite receivers.


Appearance

  1. External antenna sockets (* Connect to external antennas).
  2. Power button Press and hold to power the B618 on or off.
  3. USB port Connect to a USB device.
  4. WAN/LAN port

– Working as a LAN port when connected to a computer, switch, or other LAN device.

– Working as a WAN port when connected to an Ethernet port on the wall.

  1. Landline phone port Connect to a telephone.
  2. Power input Connect to compatible power adapter.
  3. Signal indicators Green: signal reception available (more indicators mean better reception).
  4. WPS button Press and hold to active WPS connection when Wi-Fi is turned on.
  5. Indicators
  6. Micro-SIM card slot Accommodate a micro-SIM card.
  7. RESET button Restore the LTE CPE to its factory settings.


* Power LED indicator

Off: Power off.

On: Power on.


* Status LED indicator

Off: Data server connection is disconnected.

Blinking in green: Firmware update.

Green: Get IP address of WAN.


* LAN LED indicator

Off: No device is connected to a LAN port.

Blinking: data is being transmitted through a LAN port.

Green: At least one of the LAN ports is connected to a device.


* Wi-Fi LED indicator

Off: Both 2.4G and 5G Wi-Fi is closed.

Blinking in green: WPS open.

Green: Both or one of the 2.4G and 5G Wi-Fi is opened.


* Mode LED indicator

Steady cyan/blue/ yellow: connected to a mobile network.

Steady green: connected to an Ethernet network.

Steady red: The SIM card is not recognized, the PIN has not been entered, or the PIN verification failed.


Huawei B618 Setup

  1. Installing the micro-SIM card Install the micro-SIM card according to the illustration.

– Note: When removing the micro-SIM card, gently press the micro-SIM card in, then release. The card will automatically pop out.

– Do not remove the micro-SIM card when the LTE CPE is powered on. Doing so will affect the performance of your LTE CPE, and data stored on the micro-SIM card may be lost.


  1. Connecting to a power adapter

– Install the power adapter according to the illustration.


Note: Use the provided power adapter. Use of an incompatible power adapter or one from an unknown manufacturer may cause the LTE CPE to malfunction, fail, or could even cause a fire. Such use voids all warranties, whether expressed or implied, on the product.


Connecting to your LTE B618 router’s Wi-Fi network

Once the router has connected to a mobile data network, you can connect your computer or mobile phone to the router’s Wi-Fi network to access the Internet. Please refer to the label on the bottom of the router for the default wireless network name (SSID) and password (Wi-Fi KEY).

Note: 1.) When the Wi-Fi LED indicator is steady on, Wi-Fi is enabled. To enable or disable Wi-Fi, refer to the help section on the router’s web-based management page. 2.) Ensure that you promptly change the Wi-Fi network name and password on the web-based management page to prevent unauthorized access to your Wi-Fi network. Once you have changed the password, you will need to reconnect to the router’s Wi-Fi network.


Configuring your Huawei B618 router

You can configure the router using the web-based management page. Please refer to the label on the bottom of the router for the default IP address, user name, and password. More information can be found in the help section of the web-based management page.

Note: You will be prompted to change the default login password for the web-based management page to prevent unauthorized users from changing the router’s settings.


Optional configurations

Note: The features described in this section are for reference purposes only. Your router may not support all of these features.

  1. Connecting multiple devices You can connect a computer, or landline phone to the router to access the Internet, make telephone calls, and more.
  2. Installing external antennas You can install external antennas to improve signal reception. Please contact your network service provider to purchase the antennas.

Note: Turn off the router and unplug the power adapter before installing any external antennas. External antennas are only suitable for indoor use. Do not use external antennas during thunderstorms. Only use external antennas provided by your network service provider.


  1. Accessing the Internet through an Ethernet port

You can connect the router to a wall-mounted Ethernet port using an Ethernet cable to connect to the Internet when you have used up your data allowance. Configure the relevant settings on the web-based management page before connecting to the Internet through an Ethernet port. More information can be found in the help section of the web-based management page.

  1. Restoring to Factory Settings

If you forget some configuration parameters, you can restore the LTE CPE to its factory settings and then configure the LTE CPE again. Use a sharply pointed object to press and hold the RESET button until the Power indicator turns off. The LTE CPE is then restored to its factory settings.


Note: After you carry out this operation, the LTE CPE’s personal configuration parameters will all be deleted. All configurations on the web management page will be restored to the factory settings.


  1. Establishing a WPS Connection

If the Wi-Fi device to be connected to the LTE CPE supports WPS, the wireless network encryption key is generated automatically and there is no need to enter it manually. The steps for WPS connection are as follows: 1.) Turn on the CPE. 2.) Turn on the Wi-Fi device to be connected to the LTE CPE. 3.) Activate the LTE CPE’s WPS. 4.) Activate the Wi-Fi device’s WPS.


Note: Press and hold the WPS button for two to five seconds to set up a 2.4 GHz WPS connection, or press and hold the button for more than five seconds to set up a 5 GHz WPS connection. For specific instructions for the Wi-Fi device, refer to the device’s user manual.


  1. Downloading Huawei HiLink App

Scan the QR code to download the Huawei HiLink App and configure the router from your phone.

Netgear Nighthawk M1- Best Mobile Router for Travel

Not all mobile devices are equipped with a SIM card. However, you have to know the latest Netgear Nighthawk M1 with high speed via LTE, the most important is that it’s an LTE advanced Pro router with SIM card slot and Ethernet port. The Nighthawk M1 could achieve download speed up to 1Gigabit, which is almost in the range of the 5G speed.


Nighthawk M1 from Netgear is known for a fleet router for mobile use, can it also be used at home or office. The 4G SIM router has a battery for mobile operation and can be loaded in every suitcase and almost every handbag. It simply gets his network from the air via the LTE wireless networks and transfers data for up to 20 devices. Thus, it should be the ideal companion for every trip.


Netgear introduced the Nighthawk M1 last year at the Consumer Electronics Show (CES) in Las Vegas.  The Australian carrier Telstra first introduced the Nighthawk router to its product range and then US carrier ATT followed. A year later, the device is finally available for users in Europe. Fortunately, the Netgear M1 comes out in Europe without a provider branding, so it’s unlocked can be operated in any network. In the US, the Nighthawk mobile router is limited to AT&T’s network while the Nighthawk router is limited to Telstra in Australia. The built-in modem supports the LTE Cat.16 and achieves maximum speeds of 1 gigabit per second (Gbps) in the download, at least in theory because only a few areas in Europe give such transmission rates. In addition, the transfer to mobile devices is possible via WLAN-ac or the built-LAN connection. The Netgear Nighthawk M1 always ensures fast Internet everywhere.


Anyone surfing through LTE should always keep an eye on current consumption so as not to exceed the high-speed volume. The Nighthawk M1 succeeds on a built-2.4-inch display. At the side of it are the status indicator for the current battery level and the strength of the network. If the latter is too low, the Netgear M1 will accept a maximum of two TS-9 antennas for reception. The user can control or setup the mobile 4G router through the web page or Netgear Mobile APP. The Netgear Mobile app can be used to make settings and even set up a parental control. The built-in battery is generously sized with 5040 mAh and can keep continuous working for a day and a night according to the manufacturer.

Netgear Nighthawk M1: Price and Availability

Since Telstra and ATT had already presented the product to the public for a long time, here now there are many unlocked Nighthawk M1 available in the market. The unlocked Nighthawk M1 is available on online store www.4gltemall.com with a price of around 459.00USD with free 4G MIMO Antenna with two TS-9 connectors. For the operation, it then still needs a micro-SIM card and a corresponding tariff. If you would take the Nighthawk M1 for travel, you’d better get an unlocked Nighthawk M1 router and get a valid SIM card from a network provider in the destination to work with the M1 router. But you will never get an unlocked Nighthawk M1 from the carriers in the destination country.

How to Use Netgear Nighthawk M1 Gigabit Router

This chapter provides an overview of Netgear Nighthawk M1 4GX Gigabit LTE Mobile Router features and instructions for how to set up your mobile router and connect to the Internet.

The chapter covers the following topics:

  • Get to Know Your Mobile Router
  • Install the SIM Card and the Battery
  • Download the NETGEAR Mobile App
  • Power On Your Mobile Router
  • Use the NETGEAR Mobile App to Set Up the Mobile Router
  • External Antennas


Get to Know Your Mobile Router

Your mobile router lets you create a WiFi access point in any location with cellular network coverage. Use a WiFi access point to connect your computer or mobile devices to your service provider’s mobile broadband network and connect to the Internet.

  • Rechargeable battery included with the mobile router
  • Wall socket using the AC adapter and USB cable
  • USB port on your computer Your mobile router can receive power from any of the following sources:


Top Front View

The following figure shows the top front view of the mobile router.


Power Button

Use the Power button to wake the mobile router and to power the device on and off.


Desired Result Action
Turn on the mobile router. Press and hold the Power button for three seconds.
Turn off the mobile router. Press and hold the Power button for five seconds.
Wake the router. Press and quickly release the Power button.
Switch between screens. Press and quickly release the Power button.


Status LED

The LED indicates the device’s connection status.

LED What the Pattern Means
Slow blue blink The Nighthawk M1 router is ready.
Fast blue blink The Nighthawk M1 router is transferring data.
Slow amber blink The Nighthawk M1 router is not ready.


LCD Screen

The LCD screen displays information shown in the following figure.


Rear View

The following figure shows the rear view of the mobile router.

The mobile router rear panel includes the following ports:

  • USB type A port. Connect a USB storage device or charge a smartphone.

For information about USB storage devices, see Connect a USB Storage Device in the article Netgear M1 Share Media and Storage.

For information about charging a smartphone, see see Use the Mobile Router to Jump Boost Another Device in How to Manage Netgear MR1100 Router Battery Usage and Charging.

  • USB type C port. Connect the USB type-C cable that came in the package to recharge the battery or for a tethered connection to a computer.

For more information about recharging the battery, see Recharge the Battery From a Wall Socket  and Recharge the Battery From a Computer USB Port in the article How to Manage Netgear MR1100 Router Battery Usage and Charging. .

A tethered connection to a computer lets you access the mobile router from a web browser without a WiFi connection. See Tethered Connection in How to Connect to the Netgear M1 Nighthawk Mobile Router.

  • Ethernet port. You can connect an Ethernet device to this port and you can offload your mobile Internet data. The Ethernet connection speed is about 500 Mbps.

When you are using an Ethernet connection, you can use the USB type C cable and the AC adapter to recharge the mobile router battery.

Note: You cannot use an Ethernet connection and use a tethered connection to access the mobile router at the same time.


For information about offloading data, see Offload Your Mobile Internet Connection in Manage Netgear M1 Internet Connection.

For information about how to use a charge-only tethered connection, see Use the USB Type C Cable to Charge Only in How to Manage Battery Usage and Charging.


Optional Accessories

The following optional accessories are also supported:

  • Optional micro SD card (sold separately)
  • Optional antennas (sold separately)

For more information, visit netgear.com/telstraaccessories.


Install the SIM Card and the Battery

To install the SIM card and the battery:

To obtain an activated micro SIM (3FF format) card, contact Telstra.

  1. Make sure that power to the mobile router is off.
  2. Remove the cover on the bottom of the mobile router.

Place your thumbs on the arrows on the cover and press down while sliding the cover up.

  1. Carefully slide the micro SIM card into the slot.
  2. Align the battery connectors and insert the battery.
  3. If you purchased a micro SD card, insert the card into the micro SD slot.
  4. Replace the mobile router cover.


Download the NETGEAR Mobile App

The NETGEAR Mobile app lets you set up the mobile router. After initial setup, you can use the app to view or change the mobile router settings. You can also use it to enable Arlo support, play and share media, and enable the travel router feature.

To download the NETGEAR Mobile app:

  1. Connect your mobile device to the Internet.
  2. Open a web browser.
  3. Visit http://netgear.com/mobileapp.
  4. Download the NETGEAR Mobile app.


Power On Your Mobile Router

To power on your mobile router:

  1. Press the Power button on your mobile router.

The LED lights blue.

  1. To view the WiFi name and password, press and release the Power button to toggle through the Nighthawk M1 router LCD displays.


Use the NETGEAR Mobile App to Set Up the Mobile Router

To set up the mobile router:

You must use the NETGEAR Mobile app to set up the mobile router.

  1. Launch the NETGEAR Mobile app.

The app prompts you to change the password for the admin user name and to change the WiFi name and WiFi password.

Note: The default password for the admin user name is admin. We strongly recommend that you change this password to a more secure password.

  1. Follow the onscreen instructions to set up your mobile router.


External Antennas

Using an external antenna might be recommended in areas of lower coverage to improve your device performance. MIMO Dual TS9 antennas are available from your retailer. Insert the connector carefully to avoid damage to your device.

How to Connect to the Netgear M1 Nighthawk Mobile Router

This chapter is about how to connect to Netgear M1 Nighthawk Mobile router, covering the following topics:

  • Connect to the Mobile Router Network
  • Use the NETGEAR Mobile App to Access the Mobile Router
  • Use a Web Browser to Access the Router


Connect to the Mobile Router Network

You can connect your computers and mobile devices to the mobile router WiFi network. You can also connect a computer to the mobile router through a tethered connection using the USB cable that came in the package with the mobile router.

Note: If you set up your computer to use a static IP address, change the settings so that it uses Dynamic Host Configuration Protocol (DHCP).

WiFi Connection

You can find and select the WiFi network or you can connect to the router’s WiFi network with Wi-Fi Protected Setup (WPS). For information about using WPS, see Use WPS to Connect to the Mobile Router WiFi Network in the article How to Specify Netgear Nighthawk MR1100 Mobile Router Network Settings.

.

To find and connect to the WiFi network:

  1. Make sure that the mobile router is powered on (its LED is lit).
  2. Check to make sure that WiFi is enabled on your computer or mobile device and search for WiFi networks.

Refer to the following table or the manual for your WiFi-enabled device for further details on searching for WiFi networks.


Device Instructions
 

Windows computer

Click the Internet Access icon, which is usually found on the bottom right side of your screen.
Mac computer Go to the WiFi menu and select Network.
Mobile devices Go to the Settings menu and tap the WiFi icon.
  1. Select the WiFi name displayed on your Nighthawk M1 screen.
  2. Enter the WiFi password exactly as shown on the Nighthawk M1 screen. The password is case-sensitive.

Your computer or mobile device connects to the WiFi network.


Tethered Connection

To connect the mobile router to the USB port on your computer:

Attach one end of the USB (type C) cable to the mobile router and plug the other end into the USB port on your computer.

Your computer automatically connects to the mobile router LAN (local area network). The first time you connect this way, your computer might display notifications about detecting a new device.

Note: If you want to use data offloading with a tethered connection, use WiFi offloading instead of Ethernet offloading. Tethered access is not supported during Ethernet offloading. For more information about offloading, see Offload Your Mobile Internet Connection in the article about Manage Netgear M1 Internet Connection.


Use the NETGEAR Mobile App to Access the Mobile Router

You use the NETGEAR Mobile app to set up the mobile router. After initial setup, you can launch the app again and use it to log in to the mobile router to view or change its settings.

To log in to the mobile router from the NETGEAR Mobile app:

  1. On your smartphone, connect to the mobile router’s WiFi network.
  2. Launch the NETGEAR Mobile app.

You might be prompted to enter the admin password. During setup, you were prompted to change this password (the default password is admin).

  1. If prompted, enter the admin password.

The app displays the following information:

  • Notifications
  • Data usage as provided by your carrier
  • Your cellular and WiFi signals and battery
  • Current WiFi band (swipeable)
  • WiFi name and password
  • Connected devices.
  1. Swipe down.

The dashboard displays the icons shown in the following table.


Use a Web Browser to Access the Router

When you connect to the network (either with WiFi or with a tethered connection), you can use a web browser to access the router, to view and change its settings.

To log in to the router from a web browser:

  1. From a computer that is connected to your network, launch a web browser.
  2. Enter http://m.home or http://192.168.1.1. A login window opens.
  3. Enter the router user name and password.

The user name is admin. The user name and password are case-sensitive.

How to Manage Netgear MR1100 Router Battery Usage and Charging

This chapter introduces some simple application and setting for Netgear Nighthawk MR1100, including the following sections:

  • Extend Battery Life
  • Change the LCD Screen Display
  • Recharge the Battery
  • Use the Mobile Router to Jump Boost Another Device
  • Battery Tips
  • General Battery Safety
  • Appropriate Batteries and Chargers
  • Battery Disposal


Extend Battery Life

The mobile router, by default, is configured to optimize battery life. If your mobile router is plugged in for an extended period of time, the mobile router automatically reduces charging levels to help protect battery life.

The following factors affect battery life:

  • Standby time
  • Data throughput
  • Mobile broadband signal strength (the better the signal, the longer the battery life)
  • Dual-band WiFi (when all of your devices support 5 GHz WiFi, dual-band WiFi allows faster downloads but uses more power)
  • Guest WiFi, when enabled, uses more power.


To extend the battery life, use any of the following methods:

  • Adjust WiFi settings.
  • Adjust display settings.
  • Use a tethered USB connection to your computer.
  • WiFi range


Change the LCD Screen Display

You can change the brightness and the time-out for the LCD.

Change the LCD Screen Time-Out and Brightness From the NETGEAR Mobile App

To change the LCD screen time-out and brightness:

  1. On your smartphone, connect to the mobile router’s WiFi network.
  2. Launch the NETGEAR Mobile app.
  3. Swipe down.The dashboard displays.
  4. Tap Settings.The Settings page displays.
  5. To change the screen time-out, select the number of minutes for the screen time-out.
  6. To change the screen brightness, move the slider.


Change the LCD Screen Time-Out and Brightness From a Web Browser

To change the screen time-out:

  1. From a computer that is connected to your network, launch a web browser.
  2. Enter http://m.home or http://192.168.1.1. A login page displays.
  3. Enter the administrator login password. The password is case-sensitive.The dashboard displays.
  4. Select Settings > Advanced Settings > Device.The Device page displays.
  5. To change the screen time-out, select the number of minutes for the screen time-out.
  6. To change the screen brightness, move the slider.
  7. Click the Apply button. Your settings are saved.


Recharge the Battery

The battery comes partially charged. You can recharge the battery from a wall socket or from the USB port on your computer. Recharging from a wall socket is faster than recharging from a USB port. The mobile router supports Quick Charge 2.0 technology. You can charge the mobile router with a Quick Charge–certified adapter, which charges the battery up to 75 percent faster than regular power adapters.

Turn off USB tethering if you only want to charge your mobile router with your computer. For more information, see Turn Off USB Tethering in Internal Access Control.


Recharge the Battery from a Wall Socket

To recharge the battery from a wall socket:

  1. Attach one end of the micro USB cable to the connector on the right on the mobile router and attach the other end to the wall charger (included).
  2. Plug the wall charger into a wall socket. A lightning bolt appears on the Battery icon when the battery is charging. The Battery icon on the LCD indicates when the battery is fully charged and a notification displays.

Note: The battery continues to charge when the mobile router is powered off.


If your battery does not charge, check the following:

  • Is the mobile router hot? If you are in a low-coverage area, are transferring a lot of data, or left the mobile router in a hot location, the internal temperature of the mobile router can rise above 45°C. In these conditions, the battery cannot be charged due to safety limits with lithium-ion battery technology.
  • Make sure that the USB cable and the AC wall charger are connected securely and are working correctly.
  • If the wall socket is controlled by a switch, make sure that the switch is in the power-on position.


Recharge the Battery from a Computer USB Port

To recharge the battery from the USB port on your computer:

  1. Attach one end of the micro USB cable to the mobile router and plug the other end into the USB port on your computer.

The Battery icon includes a lightning bolt to indicate that the battery is charging.

The Battery icon on the LCD indicates when the battery is fully charged and a notification displays.

Note: The LCD goes into sleep mode after a set time to extend battery life. To wake up the LCD, press and quickly release the Power button.


Use the USB Type C Cable to Charge Only

You can log in to the mobile router and specify a setting so that the USB type C cable is used only for charging and not to access the mobile router using a web browser. You might want to do this if you are using the Ethernet port and a wall socket is not available to charge the mobile router.

To specify a USB type C cable charge-only setting:

  1. From a computer that is connected to your network, launch a web browser.
  2. Enter http://m.home or http://192.168.1.1. A login window opens.
  3. Enter the router user name and password. The user name is admin. The user name and password are case-sensitive. The mobile router dashboard displays.
  4. Select Setup > Router Setup. The Router Setup page displays.
  5. In the TETHERING section, select Charge only.

Your settings are saved. When you connect the USB type C cable, the mobile router battery charges, but you cannot use the tethered connection to access the mobile router with a web browser.


Use the Mobile Router to Jump Boost another Device

If your smartphone or other device is low on or out of battery power, you can give it a boost by connecting it to the mobile router’s USB port A connector.

Battery Tips

The following tips explain best practices for battery usage and care:

  • Charge batteries in a room-temperature environment, which is generally between 68°F and 79° F (20°C and 26°C). Charging might be temporarily disabled if the battery temperature exceeds 113°F (60°C). If the battery temperature is hot but less than 113°F (60°C), the battery can charge at a slower rate than usual.
  • If a battery exhibits significantly shorter runtime or discharge capacity compared to when it was new, it reached the end of its reasonable lifetime. Consider replacing it.
  • If a battery does not charge or exhibits excessive charging time, it is possible that it reached the end of its life and might need to be replaced.
  • All batteries degrade and lose charge capacity over time as a result of use or storage and must eventually be replaced.
  • Batteries are best stored in a cool, dark, dry place. Avoid storage in direct sunlight and in vehicles parked outdoors.
  • Batteries might get warm while charging and discharging. This is normal behavior for all batteries.
  • Use the AC adapter and the USB cable that came with this device.
  • Use the latest firmware. Check for updates on a regular basis.
  • Device performance and runtime are affected by workload or usage. Higher workloads or usage can lead to higher battery temperatures and faster battery power consumption.
  • Streaming large amounts of data affects the power consumption and reduces the operating time of the battery.

General Battery Safety

Observe the following guidelines:

  • Stop using a battery if its case appears damaged, swollen, or compromised. Examples include, but are not limited to, leaking, odors, dents, corrosion, rust, cracks, swelling, melting, and scratches.
  • Do not expose batteries to fire or other heat generating environments.
  • Do not place the battery or the device in areas that might get hot. Examples include, but are not limited to, on or near a space heater, cooking surface, cooking appliance, iron, radiator, or fireplace.
  • Do not get the battery or the device wet. Even though it might dry and appear to operate normally, the circuitry can slowly corrode and defeat its safety circuitry.
  • Do not crush, puncture, deform, or put a high degree of pressure on the battery, which can cause an internal short circuit, resulting in overheating.
  • Avoid dropping the battery or the device. Dropping it, especially on a hard surface, might cause damage to the battery and the device. If you suspect damage to the battery or the device, replace it.
  • When the battery is outside the device, do not allow the battery to come in contact with metal objects, such as coins, buttons, jewelry, or tools.
  • Do not disassemble or modify batteries. Do not use a battery for anything other than its intended purpose.


Appropriate Batteries and Chargers

Observe the following guidelines:

  • Use only approved batteries in the device. Purchase only products and accessories recommended by NETGEAR or your carrier. Use of unapproved batteries, products, or accessories will void your warranty.
  • Do not use incompatible batteries and chargers. Some websites and second-hand dealers, not associated with reputable manufacturers and carriers, might sell incompatible or even counterfeit batteries and chargers.
  • If you are unsure about whether a replacement battery or charger is compatible, contact NETGEAR.
  • Quick Charge 2.0–enabled devices must be paired with Quick Charge 2.0–certified adapters.


Battery Disposal

Follow disposal regulations in your region, and handle batteries safely. Observe the following guidelines:

  • Disposal regulations vary by region. Dispose of old batteries and equipment in compliance with your local regulations.
  • Proper disposal might include recycling programs for batteries, cell phones, or other electronic waste.
  • Do not dispose of batteries in a fire.

Netgear Nighthawk M1 Mobile Router Internet Access Control

The Netgear Nighthawk M1 router comes with a built-in firewall that helps protect your home network from unwanted intrusions from the Internet.

This chapter includes the following sections:

  • Set up Parental Controls
  • Access Control
  • Turn off USB Tethering
  • Manage Website Filters
  • Set up a Schedule for Internet Access
  • Enable SIM Security
  • Enable Port Forwarding
  • Set up Port Filtering
  • Enable DMZ


Set Up Parental Controls

The first time that you select Parental Controls, your browser goes to the Live Parental Controls website, where you can learn more about parental controls and download the application.

After you set up and enable parental controls, you can change the web filtering level for each device on the network through the network map page on the genie app.

To set up parental controls:

  1. From a computer that is connected to your network, launch a web browser.
  2. Enter http://m.home or http://192.168.1.1.

A login page displays.

  1. Enter the administrator login password.

The password is case-sensitive.

The dashboard displays.

  1. Select Settings > Security > Parental Controls.

The Parental Controls page displays.

  1. Select the Enable check box.

Because Live Parental Controls uses free OpenDNS accounts, you must log in or create a free account.

  1. Log in to your OpenDNS account:
  • If you already own an OpenDNS account, log in to your account.
  • If you do not own an OpenDNS account, click the Sign Up link to create a new account a log in.
  1. Select a filtering level.
  2. To create a list of unrestricted devices, do the following:

a.In the Unrestricted Devices section, click the ADD button.

  1. Select the device.

The device is added to the list.

  1. Click the Apply button.

Your settings are saved.


Access Control

You can use access control to set up a list of devices to be blocked from accessing the mobile router or to be allowed access.

Set Up Access Control From the NETGEAR Mobile App

To set up access control:

  1. On your smartphone, connect to the mobile router’s WiFi network.
  2. Launch the NETGEAR Mobile app.
  3. Swipe down.

The dashboard displays.

  1. Tap Devices.

The Devices page displays.

  1. Tap Block List or Allow List.

Depending on your selection, the page displays an Allow List or a Block List.

  1. To turn blocking on or off, tap the Block all in list slider.
  2. To turn an allow list on or off, tap the Allow only in list slider.
  3. To add a device to the list, tap + and select the device.

The device is added to the list.

  1. To remove a device from the list, select the device and then tap the trash can.

The device is removed from the list.

Set Up Access Control from a Web Browser

To set up access control:

  1. From a computer that is connected to your network, launch a web browser.
  2. Enter http://m.home or http://192.168.1.1.

A login page displays.

  1. Enter the administrator login password.

The password is case-sensitive.

The dashboard displays.

  1. Select Settings > Security > Access Control.

The Access Control page displays.

  1. Select the Enable check box.
  2. In the Filter Type menu, select Allow List or Block List.

Depending on your selection, the page displays an Allow List or a Block List.

  1. To add a device to the list, click the ADD button and select the device.

The device is added to the list.

  1. To remove a device from the list, select the device and then click the DELETE button.

The device is removed from the list.


Turn Off USB Tethering

USB tethering lets you connect to the Internet from supported computers with a USB cable and charge the mobile router battery at the same time.

Turn off USB tethering if you only want to charge your mobile router with your computer.

Turn Off USB Tethering From the NETGEAR Mobile App

To turn off tethering:

  1. On your smartphone, connect to the mobile router’s WiFi network.
  2. Launch the NETGEAR Mobile app.
  3. Swipe down.

The dashboard displays.

  1. Tap Settings.

The Settings page displays.

  1. Tap General.

The General page displays.

  1. Under ROUTER, tap Tethering to toggle between Charge only and Charge + tether.


Turn Off USB Tethering From a Web Browser

To turn off tethering:

  1. From a computer that is connected to your network, launch a web browser.
  2. Enter http://m.home or http://192.168.1.1.

A login page displays.

  1. Enter the administrator login password.

The password is case-sensitive.

The dashboard displays.

  1. Select Settings > Setup > Router Setup.

The Router Setup page displays.

  1. In the Use USB port for section, select Charge only.
  2. Click the Apply button.

Your settings are saved.


Manage Website Filters

You can set up a filter to block or allow access to websites that you specify. You can also set up a list of devices that are unrestricted. The website filtering does not apply to unrestricted devices.

To set up a website filter:

  1. From a computer that is connected to your network, launch a web browser.
  2. Enter http://m.home or http://192.168.1.1.

A login page displays.

  1. Enter the administrator login password.

The password is case-sensitive.

The dashboard displays.

  1. Select Settings > Security > Website Filters.

The Website Filters page displays.

  1. Select the Enable check box.
  2. In the Filter Type menu, select Block List or Allow List.

Depending on your selection, a Blocked Websites list or an Allowed Websites list displays.

  1. To add a website to the list, click the ADD button and enter the website.

The website is added to the list.

  1. To edit an entry in the list, do the following:
  2. Select its check box.
  3. Click the Edit icon.
  4. Enter the changes.
  5. To remove a website from the list, select its check box and then click the DELETE button.

The website is removed from the list.

  1. To create a list of unrestricted devices, do the following:
  2. In the Unrestricted Devices section, click the ADD button.
  3. Select the device.

The device is added to the list.

  1. Click the Apply button.

Your settings are saved.


Set Up a Schedule for Internet Access

To set up a schedule for Internet access:

  1. From a computer that is connected to your network, launch a web browser.
  2. Enter http://m.home or http://192.168.1.1.

A login page displays.

  1. Enter the administrator login password.

The password is case-sensitive.

The dashboard displays.

  1. Select Settings > Security > Schedule.

The Schedule page displays.

  1. Select the Enable check box.
  2. To add a schedule rule, click the Add button.

The NEW RULE page displays.

  1. Specify the name of the rule and the days and times for the rule.
  2. Click the SAVE button.

Your settings are saved.


Edit a Schedule Rule

To edit a schedule rule:

  1. From a computer that is connected to your network, launch a web browser.
  2. Enter http://m.home or http://192.168.1.1.

A login page displays.

  1. Enter the administrator login password.

The password is case-sensitive.

The dashboard displays.

  1. Select Settings > Security > Schedule.

The Schedule page displays.

  1. Click the Edit icon for the rule.

The EDIT RULE page displays.

  1. Change the settings.
  2. Click the SAVE button.

Your settings are saved.


Delete a Schedule Rule

To delete a schedule rule:

  1. From a computer that is connected to your network, launch a web browser.
  2. Enter http://m.home or http://192.168.1.1.

A login page displays.

  1. Enter the administrator login password.

The password is case-sensitive.

The dashboard displays.

  1. Select Settings > Security > Schedule.

The Schedule page displays.

  1. Select the check box for the rule.
  2. Click the DELETE button.

The rule is deleted.


Enable SIM Security

If you enable SIM security, you must enter a SIM PIN each time you power on the mobile router.

Enable SIM Security From the NETGEAR Mobile App

To enable SIM security:

  1. On your smartphone, connect to the mobile router’s WiFi network.
  2. Launch the NETGEAR Mobile app.
  3. Swipe down.

The dashboard displays.

  1. Tap Security.

The Security page displays.

  1. Tap SIM Security.

The SIM Security page displays.

  1. Tap ACTIVATE.

The Enter SIM Security page displays.

  1. Enter a PIN.
  2. Tap OKAY.

Your settings are saved.

If you enter an incorrect PIN three times, the SIM is blocked. If the SIM is blocked, contact your network service provider to receive a PUK number to unblock the SIM.


Enable SIM Security from a Web Browser

To enable SIM security:

  1. From a computer that is connected to your network, launch a web browser.
  2. Enter http://m.home or http://192.168.1.1.

A login page displays.

  1. Enter the administrator login password.

The password is case-sensitive.

The dashboard displays.

  1. Select Settings > Network > SIM Security.

The SIM Security page displays.

  1. Click the ACTIVATE button.
  2. Enter your PIN.
  3. Click the Apply button.

If you enter an incorrect PIN three times, the SIM is blocked. If the SIM is blocked, contact your network service provider to receive a PUK number to unblock the SIM.


Enable Netgear Nighthawk M1 Port Forwarding

Port forwarding is an advanced feature. If your computer is hosting a server, you can enable port forwarding so that other users can access the server.

Note: Port forwarding creates a security risk. When not required, disable port forwarding.

To enable port forwarding:

  1. From a computer that is connected to your network, launch a web browser.
  2. Enter http://m.home or http://192.168.1.1.

A login page displays.

  1. Enter the administrator login password.

The password is case-sensitive.

The dashboard displays.

  1. Select Settings > Router > Port Forwarding.

The Port Forwarding page displays.

  1. Select the Enable radio button.

The Port Forwarding list displays.

Incoming traffic is forwarded to specific ports and devices on your network using their local IP addresses.

  1. To add a port forwarding address, click the ADD button.

The ADD SERVICE page displays.

  1. Enter the following port forwarding information:
  • Rule Name. Enter a descriptive name.
  • IP Address. Enter the IP address of the connected device.
  • Port. Enter the port number that the application uses.
  • Protocol. If you are unsure, select TCP.
  1. Click the ADD button.

Your settings are saved.


Set Up Port Filtering

You can select which applications (for example, HTTP, FTP, email servers) can access the Internet. Used with other security measures such as a firewall, port filtering can enhance network security.

To set up port filtering:

  1. From a computer that is connected to your network, launch a web browser.
  2. Enter http://m.home or http://192.168.1.1.

A login page displays.

  1. Enter the administrator login password.

The password is case-sensitive.

The dashboard displays.

  1. Select Settings > Router > Port Filtering.

The Port Filtering page displays.

  1. Select the Enable check box.

The Filter Type menu displays.

  1. Select Block List or Allow List.

The ADD SERVICE page displays.

  1. Enter the following port forwarding information:
  • Service Name. Enter a descriptive name.
  • Port. Enter the port number that the application uses.
  • Protocol. If you are unsure, select TCP.
  1. Click the ADD button.

Your settings are saved.


Enable DMZ

In a demilitarized zone (DMZ) network configuration, a computer runs outside the firewall in the DMZ. This computer intercepts incoming Internet traffic, providing an extra layer of protection for the rest of the network, and sending all incoming data to a particular IP address.

To enable the DMZ and designate a computer to screen incoming traffic:

  1. From a computer that is connected to your network, launch a web browser.
  2. Enter http://m.home or http://192.168.1.1.

A login page displays.

  1. Enter the administrator login password.

The password is case-sensitive.

The dashboard displays.

  1. Select Settings > Advanced > Other.

The Other page displays.

  1. Select the Enable check box.
  2. In the DMZ Address field, enter the IP address of the computer to which you want all data sent.

If the mobile router is tethered using a USB cable, this address is 192.168.1.4. If the mobile router is connected using WiFi, the first WiFi client’s IP address is usually 192.168.1.74.

  1. Click the Apply button.

Your settings are saved.

How to Specify Netgear Nighthawk MR1100 Mobile Router Network Settings

This chapter provides information about how to configure various aspects of the Netgear Nighthawk MR1100 mobile router such as WiFi settings, WAN settings, and router settings. The chapter covers the following topics:

  • Select a WiFi Profile
  • WiFi Settings
  • Use WPS to Connect to the Mobile Router WiFi Network
  • Universal Plug-N-Play
  • Enable IP Pass-Through Mode
  • Specify the IP Addresses That the Mobile Router Assigns
  • Disable the DHCP Server Feature in the Mobile Router


Select a WiFi Profile

You can view or change the mobile router WiFi settings. The following WiFi profiles are available:

  • Dual-band WiFi (2.4 GHz and 5 GHz). Connect 2.4 GHz and 5 GHz devices to transfer data at higher throughputs.
  • 2.4 GHz WiFi. Use only the 2.4 GHz WiFi band.
  • 5 GHz WiFi. Use only the 5 GHz WiFi band.
  • Guest WiFi. Share your WiFi with temporary visitors without exposing the devices on your network or letting visitors access the mobile router web page.
  • Turn Off WiFi. This turns off the WiFi signal from the mobile router. With this setting, you can only connect to the mobile router with a tethered USB connection.

Note: Whenever you change WiFi settings, any devices connected to the mobile router are disconnected and might need to be reconnected.


Select a WiFi Profile From the NETGEAR Mobile App

To select a WiFi profile:

  1. On your smartphone, connect to the mobile router’s WiFi network.
  2. Launch the NETGEAR Mobile app.
  3. Swipe down.

The dashboard displays.

  1. Tap Settings > WiFi > WiFi Profiles.

The WiFi Profiles displays.

  1. Tap a WiFi network to select it.
  2. Tap SAVE.

Your settings are saved.


Select a WiFi Profile from a Web Browser

To select a WiFi profile:

  1. From a computer that is connected to your network, launch a web browser.
  2. Enter http://m.home or http://192.168.1.1.

A login page displays.

  1. Enter the administrator login password.

The password is case-sensitive.

The dashboard displays.

  1. Select Settings > Setup > WiFi Profiles.

The WiFi Profiles page displays.

  1. Select the Enable button for the WiFi profile that you want to use.
  2. Click the Apply button.

The selected WiFi profile is activated.


WiFi Settings

Note:Whenever you change WiFi settings, any devices connected to the mobile router are disconnected and might need to be reconnected.

Specify WiFi Settings From the NETGEAR Mobile App

To specify the WiFi settings from the NETGEAR Mobile app:

  1. On your smartphone, connect to the mobile router’s WiFi network.
  2. Launch the NETGEAR Mobile app.
  3. Swipe down.

The dashboard displays.

  1. Tap WiFi.

The WiFi page displays.

  1. Change the settings.

Your settings are saved.


Specify WiFi Settings from a Web Browser

To select a WiFi profile or create a custom profile on the mobile router web page:

  1. From a computer that is connected to your network, launch a web browser.
  2. Enter http://m.home or http://192.168.1.1.

A login page displays.

  1. Enter the administrator login password.

The password is case-sensitive.

The dashboard displays.

  1. Select Settings > Setup > Wireless.

The Wireless Network page displays the settings for the 2.4 GHz and the 5 GHz WiFi bands and global WiFi settings.

  1. Change the settings as needed.

By default, the Broadcast WiFi Name SSID check box is selected for each network so that the WiFi network name displays in the list of WiFi networks for computers or mobile devices.

  1. To change the global WiFi settings, adjust the WiFi standby time or the WiFi range.
  2. Click the Apply button.

Your settings are saved.

When you change your profile options (including disabling or enabling either WiFi network), any devices connected to the mobile router are disconnected and might need to be reconnected.


Use WPS to Connect to the Mobile Router WiFi Network

To connect to the mobile router WiFi network, you can find the network and connect or you can use WPS. If the device is WPS enabled, you can use the WPS method to connect the device without using the WiFi password.

Use WPS from the NETGEAR Mobile App

To add a WPS-enabled WiFi device from the NETGEAR Mobile app:

  1. On your smartphone, connect to the mobile router’s WiFi network.
  2. Launch the NETGEAR Mobile app.
  3. Swipe down.

The dashboard displays.

  1. Tap WiFi.

The WiFi page displays.

  1. Tap WPS.
  2. Within two minutes, tap or click the WPS button on the mobile device or computer that you want to connect.

Your mobile router and the mobile device or computer communicate and establish the connection.


Use WPS From a Web Browser

To add a WPS-enabled WiFi device from the mobile router web page:

  1. From a computer that is connected to your network, launch a web browser.
  2. Enter http://m.home or http://192.168.1.1.

A login page displays.

  1. Enter the administrator login password.

The password is case-sensitive.

The dashboard displays.

  1. Select Wireless or Guest Network.

The Wireless or Guest Network page displays.

  1. Click the WPS button for the network.

The WPS page displays.

  1. Choose the WPS method that you want to use:
  • WPS button pairing. If the device you want to connect includes a WPS button, click the WPS button pairing button and, within two minutes (120 seconds), press the device’s WPS button.
  • Enter WPS PIN. If a WPS pin is associated with the device that you want to connect, click the Enter WPS PIN button and enter the device’s WPS PIN.

Your mobile router and the wireless device communicate and establish the connection.


Universal Plug-N-Play

Universal Plug N Play (UPnP) helps devices, such as Internet appliances and computers, access the network and connect to other devices as needed. UPnP devices can automatically discover the services from other registered UPnP devices on the network. UPnP is beneficial when you use applications such as multiplayer gaming, peer-to-peer connections, or real-time communications such as instant messaging or remote assistance (a feature in Windows XP). By default, UPnP is enabled in the mobile router.

Turn UPnP Off or On From the NETGEAR Mobile App

By default, UPnP is enabled in the mobile router, but you can disable and enable this feature.

To disable or enable Nighthawk M1 UPnP:

  1. On your smartphone, connect to the mobile router’s WiFi network.
  2. Launch the NETGEAR Mobile app.
  3. Swipe down.

The dashboard displays.

  1. Tap Settings.

The Settings page displays.

  1. Tap General.

The General page displays.

  1. Tap the Enable UPnP slider.

UPnP toggles off or on.


Turn UPnP Off or On From a Web Browser

By default, UPnP is enabled in the mobile router, but you can disable and enable this feature.

To disable or enable UPnP:

  1. From a computer that is connected to your network, launch a web browser.
  2. Enter http://m.home or http://192.168.1.1.

A login page displays.

  1. Enter the administrator login password.

The password is case-sensitive.

The dashboard displays.

  1. Select Settings > Advanced Settings > Other.

The Router Settings page displays.

  1. Select the UPnP Disable or Enable button.

UPnP toggles off and on.

  1. Click the Apply button.

Your settings are saved.


Enable IP Pass-Through Mode

To turn off the mobile router functionality and assign the network IP address directly to the attached device, enable IP pass-through.

If you make this change, the attached device restarts using a different driver configuration.

WARNING: If you enable this feature, WiFi is disabled and you must use a USB cable to tether the device.

Note: This feature is available to Windows computer users. If you are a Mac user, do not enable this option because you will be unable to access your device.

To enable IP pass through mode:

  1. From a computer that is connected to your network, launch a web browser.
  2. Enter http://m.home or http://192.168.1.1.

A login page displays.

  1. Enter the administrator login password.

The password is case-sensitive.

The dashboard displays.

  1. Select Settings > Setup > Router Setup.

The ROUTER SETUP page displays.

  1. Select the IP PASSTHROUGH ON button.

The default selection is AUTO.


Specify the IP Addresses That the Mobile Router Assigns

By default, the router acts as a Dynamic Host Configuration Protocol (DHCP) server. The router assigns IP, DNS server, and default gateway addresses to all computers connected to the LAN. The assigned default gateway address is the LAN address of the router.

These addresses must be part of the same IP address subnet as the router’s LAN IP address. Using the default addressing scheme, define a range between 192.168.1.2 and 192.168.1.254, although you can save part of the range for devices with fixed addresses.

To specify the pool of IP addresses that the mobile router assigns:

  1. From a computer that is connected to your network, launch a web browser.
  2. Enter http://m.home or http://192.168.1.1.

A login page displays.

  1. Enter the administrator login password.

The password is case-sensitive.

The dashboard displays.

  1. Select Settings > Setup > Router Setup.

The ROUTER SETUP page displays.

  1. Enter the starting IP address and the ending IP address.
  2. Click the Apply button.

Your settings are saved.


Disable the DHCP Server Feature in the Mobile Router

By default, the mobile router acts as a DHCP server. The router assigns IP, DNS server, and default gateway addresses to all computers connected to the LAN. The assigned default gateway address is the LAN address of the router.

You can use another device on your network as the DHCP server, or specify the network settings of all your computers.

To disable the DHCP server feature in the mobile router:

  1. From a computer that is connected to your network, launch a web browser.
  2. Enter http://m.home or http://192.168.1.1.

A login page displays.

  1. Enter the administrator login password.

The password is case-sensitive.

The dashboard displays.

  1. Select Settings > Setup > Router Setup.

The ROUTER SETUP page displays.

  1. Clear the Use NETGEAR Mobile as DHCP server check box.
  2. Click the Apply button.

Your settings are saved.

  1. (Optional) If this service is disabled and no other DHCP server is on your network, set your computer IP addresses manually so that they can access the mobile router.